
What this is: A complete how-to guide for zoning a studio apartment into distinct sleep, work, and eating areas — without drilling a single hole or asking your landlord for anything.
Who it’s for: Renters living in a studio or open-plan one-room apartment who need their space to do more than one thing at a time.
Why read it: You’ll come away with a real, room-by-room zoning plan that works with your lease — not against it.
Most people approach a studio apartment the wrong way. They move their furniture in, push everything against the walls, and then wonder why the whole place feels like a storage unit they happen to sleep in.
The bed is visible from the desk. The desk is visible from the kitchen. There’s nowhere to mentally “leave” work at the end of the day, nowhere to genuinely wind down, and the whole space carries this ambient pressure of being on all the time.
The mistake isn’t the apartment. It’s treating one room as one zone, when what you actually need is three.
Zoning — the practice of dividing an open-plan space into distinct functional areas without building a single wall — is what separates a studio that works from one that quietly drains you.
Done right, it gives you a place that feels like it has a real bedroom, a real workspace, and a real dining area, even when you’re standing somewhere you can technically see all three at once.
And the best part: every technique I’m about to walk you through is completely renter-friendly, deposit-safe, and reversible the morning you decide to move out.
Here’s how to actually do it.
Start With a Floor Plan, Not Furniture
Before you move a single piece of furniture, you need to know how your square footage is going to be divided. This sounds obvious. Almost nobody does it.
Sketch your room to scale — even a rough pencil drawing on graph paper works — and map out three dedicated zones: sleeping, working, and eating. Think of it as assigning each function its own corner or section of the room before anything goes in.
Your sleep zone almost always works best against a wall, furthest from the front door, since that’s the most psychologically “private” part of a studio.
Your work zone benefits from natural light, so position it near a window where possible. Your dining zone typically does best near the kitchen, where it logically connects to food prep without requiring a journey across the apartment with a hot plate.
The reason you do this before the furniture arrives is simple: furniture is heavy, and second-guessing costs you a whole Saturday.
I learned this in my first studio by setting up my desk directly in the sightline of my bed, which meant I spent the next three months staring at unfinished work from my pillow. Don’t repeat that.
Use Area Rugs to Anchor Each Zone on the Floor
The single most effective tool for studio apartment zoning is also one of the most affordable: an area rug.
Your eye naturally reads a rug as defining a space — it’s a visual boundary that says this is a room without needing walls to back it up. Use a different rug for each functional area, and your brain will do the rest of the work.
For your living or seating zone, go big — a rug that fits at least the front two legs of your sofa and coffee table anchors the area convincingly.
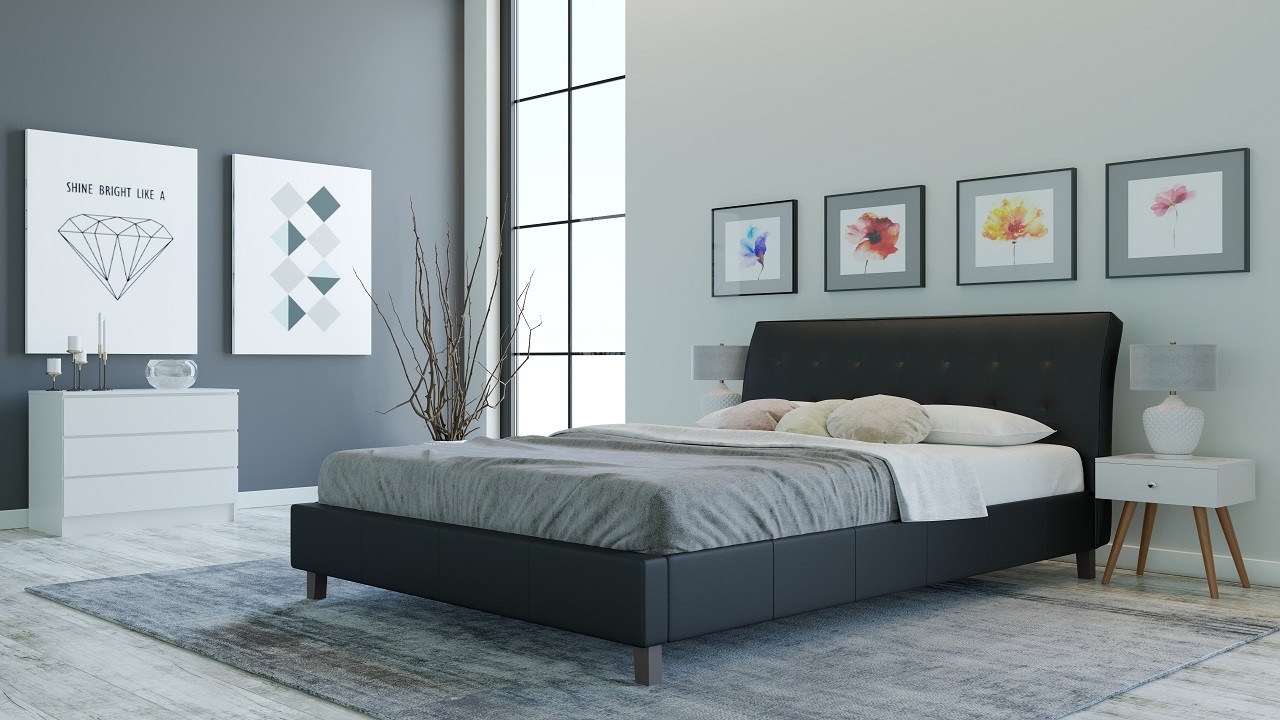
For your sleeping zone, a rug that extends on both sides of the bed and underneath the footboard makes the bed feel like a real bedroom rather than a mattress floating in space. For a dining area, a round rug under a small table reads cleanly and defines the zone without competing with the others.
Keep the three rugs in the same color family — complementary tones rather than matching — and the whole apartment will feel cohesive rather than like a yard sale.
According to Apartment Therapy’s studio layout guide, defining purposeful, designated areas is what separates a functional studio from one that just feels chaotic, and rugs are the most direct path to doing that.
Divide Sleep From Living With a Bookshelf or Open Shelving Unit
Here’s the thing about the sleep zone in particular: it needs to feel genuinely separate. Not just a bed floating in the corner with a rug under it, but a space with a sense of enclosure — somewhere your brain recognizes as a place to switch off.
The easiest deposit-safe room divider that achieves this is a tall, open bookshelf placed perpendicular to a wall.
A freestanding bookshelf used as a room divider creates a physical boundary between your sleeping area and your living area without blocking light, without making the space feel smaller, and without needing any installation beyond placing it on the floor.
Fill it with books, plants, baskets, and a few objects — the bookshelf becomes décor on both “sides” of the partition, so you’re not sacrificing aesthetics for function.
IKEA’s KALLAX and BILLY units are the go-to for this reason: they’re affordable, modular, and stable enough to act as a divider when anchored with furniture anchors to the back of a [large shelving unit](INTERNAL-LINK: small apartment decor ideas article). Just make sure whatever you use is properly stabilized — a tall bookshelf that tips is a hazard, not a design choice.
The psychological effect matters more than people expect. When you can’t see your bed from your desk, you stop associating your workspace with your sleeping space, and the reverse is also true. Your body gets actual cues about what mode it’s in, which is the whole point.
Hang Curtains From a Ceiling-Mounted Track to Divide Zones Flexibly
If a bookshelf feels too heavy or too permanent for your taste, curtain dividers are your next best option — and arguably the most elegant solution for a rental.
A ceiling-mounted curtain track with a tension rod or removable adhesive hooks allows you to hang full-length curtain panels that slide open and closed, giving you the ability to completely conceal your sleeping area when you’re working, or close off the dining corner during a video call.
The key is hanging the panels as high as possible — from the ceiling if your track allows it, or from a rod mounted close to the crown of the wall.
This creates the illusion of a full room-height partition, and floor-to-ceiling fabric has a way of making even a small studio feel genuinely architectural rather than improvised.
Apartment Therapy’s guide on separating sleep and living spaces in a studio highlights this exact approach as one of the most effective and renter-safe methods available.
Use linen, muslin, or cotton voile — light fabrics that diffuse light rather than block it completely — so the divided zones don’t feel dark or cut off. For more on how sheer curtain layers interact with light in small spaces, this piece on indoor glamping interiors makes a compelling visual case.
Pro tip: Use tension rods at the ceiling if adhesive mounts feel unreliable. Most tension rods extend to around 72 inches and can be set up between opposing walls with zero hardware.
Define Your Work Zone With Intentional Desk Placement and Lighting
A home office in a studio apartment doesn’t need a dedicated room. It needs a dedicated corner, the right desk, and lighting that signals this is where work happens.
Those three things together give your brain enough of a context shift to actually focus — which, if you’ve ever tried to write a work email from the same spot where you eat cereal and watch TV, you know is not a small thing.
For the desk itself, choose compact and wall-hugging: a narrow desk that sits flush against a wall, or a wall-mounted fold-down desk if you need to reclaim floor space when you’re done working.
The fold-down option is a personal favorite for studios because it completely disappears — your workspace literally doesn’t exist when you close it, which is one of the best ways I know to mentally “leave” the office in a one-room apartment.
Pair the desk with a dedicated task light in a cooler color temperature — around 4000–5000K is ideal for focus — so that visually and physiologically, the work zone is lit differently from the warm, ambient light you use in your living and sleeping areas.
The contrast matters. If every corner of your studio is lit the same way, your brain has no reason to behave differently in each one. CarAudience’s guide on LED lighting and color temperature goes deep on exactly this if you want the specifics.
Create a Dining Zone That Doesn’t Eat Your Entire Floor Plan
The dining area is the zone most studio dwellers either skip entirely (couch meals every night, which is a choice) or overdo with a table that turns out to be the size of a small aircraft carrier in context.
Neither extreme actually serves you. What you want is a small, right-sized dining setup that clearly signals “this is where eating happens” without consuming half your square footage.
A round two-person table is almost always the right call for a studio. Round tables take up less visual space than rectangular ones, don’t have sharp corners jabbing into the flow of the room, and are easier to navigate around in a tight layout.
If you want flexibility, a drop-leaf or fold-out table solves both the everyday and the “having people over” problem — it lives small by default and expands when you need it.
Position the table near the kitchen side of the room, which keeps the spatial logic intact: food is prepared in one place and eaten in the adjacent one, so the apartment reads as organized rather than random.
A small pendant light or a plug-in hanging lamp positioned over the dining table does disproportionate work here. It creates a visual ceiling over the zone — the eye reads “this area has its own light, therefore it’s its own room” — and it’s completely deposit-safe if you use a ceiling hook with a removable adhesive base.
HGTV’s studio apartment decorating guide specifically calls out lighting as one of the clearest ways to define function in an open-plan space, and it’s right.
Use Color and Lighting to Signal Zone Transitions
This is the subtler layer of studio apartment zoning that most guides skip over — and it’s one of the things that actually determines whether your finished layout feels like multiple spaces or just looks like one room with a lot of rugs in it.
Your brain responds to visual and sensory cues about where it is and what it should be doing, and color temperature and palette are two of the most powerful cues available.
The approach that works: give each zone a slightly different light source and a slightly different warm accent. The sleep zone should feel warmest — think table lamps with 2700K bulbs, warm neutrals, soft textures. The work zone should feel sharpest — cooler light, a cleaner surface, fewer distracting objects in the sightline.
The dining zone sits somewhere between the two — warm enough to feel convivial but defined enough to feel intentional. You’re not repainting walls (your landlord would have thoughts about that), but accent colors in textiles, artwork, and accessories can do similar work.
A different throw color on the bed versus the sofa, a different rug tone in each zone, a plant in one corner and a lamp in another — each small distinction contributes to the perceptual sense that these are different places.
Caravan color schemes and how they use tonal contrast in small spaces is a surprisingly useful reference here, because the constraint is structurally identical: one space that needs to feel like more than one space.
The 60-30-10 rule is worth applying across the whole apartment too — 60% dominant neutral, 30% secondary tone, 10% accent — which keeps the three zones feeling related rather than competing.
Choose Furniture That Does More Than One Thing
Multifunctional furniture is the backbone of any well-zoned studio, and not just in the “murphy bed that folds into a bookshelf” novelty sense.
It’s really about choosing pieces that earn their square footage by serving more than one function, so you can have everything you need without the apartment feeling like a furniture showroom.
A storage ottoman in the living zone doubles as a coffee table, extra seating when guests come over, and hidden storage for anything you want out of sight.
A bed frame with built-in drawers means you don’t need a separate dresser, which buys back significant floor space in the sleep zone. A narrow console table behind the sofa can be your dining table for one, your laptop station, and a surface for keys and bags near the door — all at once.
The goal is that every piece you bring into a studio should be able to justify its presence with at least two answers to the question: what does this actually do for me? Anything that can only answer once is probably taking up space that could be doing more work.
Control Clutter Like It’s Your Actual Job
Here’s the honest, slightly uncomfortable truth about small-space living: a studio can be zoned beautifully, furnished intelligently, and lit with real intention — and still feel overwhelming if you don’t keep the clutter down.
In an open-plan apartment, clutter is visible from everywhere, which means it competes with your zoning at every turn.
A pile of laundry on the chair in your sleep zone bleeds visually into your work zone. A desk covered in papers makes the dining zone feel chaotic even from across the room.
Vertical storage is your best friend here: tall bookshelves, wall-mounted floating shelves with removable adhesive mounting strips, and over-door organizers all use wall space that would otherwise go to waste.
Baskets on shelves are particularly useful in a studio — they give visible storage a finished, intentional look rather than making every shelf look like an overstuffed junk drawer.
HGTV’s small apartment guide describes open storage coffee tables as particularly effective in studio settings because they serve the table function while keeping floor-level items out of direct sightlines. That same principle scales to every zone: find the hidden storage options first, and the space will breathe.
Keep the Palette Cohesive Across All Three Zones
One risk with zoning a studio is overcorrecting — making each zone feel so distinctly different from the others that the whole apartment looks like three separate rooms that happened to collide in the same space.
The antidote is a cohesive color palette that runs through all three zones as a unifying thread, while each zone uses different accent tones within that family.
If your dominant palette is warm neutrals — creams, taupes, warm whites — then each zone can pull from that base while introducing its own personality. The sleep zone might lean into soft sage or warm terracotta accents. The living zone might use a deeper tone in a throw or rug.
The dining zone might bring in a small plant and a brass pendant for warmth. The zones feel distinct, but the apartment reads as one coherent home, which is the difference between a thoughtfully zoned studio and one that looks like a design student’s final project.
For reference on how color continuity works across connected small spaces, this CarAudience piece on ceiling trim and visual flow in open-concept rooms is worth a look — the logic translates directly.
The Hardest Part Is Actually the Permission
Most renters who struggle with studio living aren’t struggling because they don’t have enough money or enough square footage.
They’re struggling because they’re still waiting for someone to give them permission to treat the space like a real home — to zone it deliberately, to invest in furniture that fits, to hang things with removable adhesives and commit to a color palette and generally act like the apartment they’re paying for deserves a little intention.
It does. Your rental is your home for as long as you’re in it, and the fact that you can’t knock down walls or repaint the ceiling doesn’t change that.
Every technique in this guide is available to you right now, without your landlord’s blessing: the rugs, the curtains, the bookshelves, the lighting, the furniture arrangement, the palette. None of it requires more than an afternoon and a willingness to treat your space as worth designing.
Zone it deliberately. Light it with intention. Give each part of the room a job to do. Your studio will start feeling less like a compromise and more like exactly the home you made it.
